Posted by: Black Bart
Time to Re-Barrel Your Rem. 700 ? - 06/09/12 06:45 PM
So, some guys have asked that I post this picture essay up. Nervous about that because my narative skills are'nt what they should be.
Anyway, here's the way I used to do it. I never made a whole lot of money at it but it was worth it when I saw one my customers take a Remington 700 that I worked on and go win the NRA Nationals in High Power Silhouette.
This project is acutually for a High Power " Hunter Rifle Class " Silhouette Rifle. I still used the same exact process when I was just building a plain old long range hunting rifle. Some guys like to do all of barreling work on their lathe between centers. But this would usually mean the aid of a steady rest at some point. For me,I found the method described below is the best way to go.
Also note that the instalation of the 2 stage Anschutz 5025 / 5022 was not a normal addition to the usual long range hunting rig although some of the really long range guys out in Wyoming simply could not live without it.
So here we go. Hope you enjoy. At the very least, I hope this can help give some help asking your gunsmith about he approaches the job of re-barreling whatever ever type of bolt gun you have.
Cheers....Marv
Figure 1 shows the set up used to true the receiver which for this project was a Remington Model 700 Titanium. The action is being held in a Pratt Burnerd six jaw Set Rite adjustable scroll chuck. A precision mandrel was inserted into the action and a live center in the tailstock keeps the mandrel level. Using a Brown and Sharpe dial indicator graduated to 50 millionths of an inch, the Set Rite chuck is carefully adjusted so that the mandrel dials in perfectly thus assuring that the centerline of the action is held in a true concentric and level state.
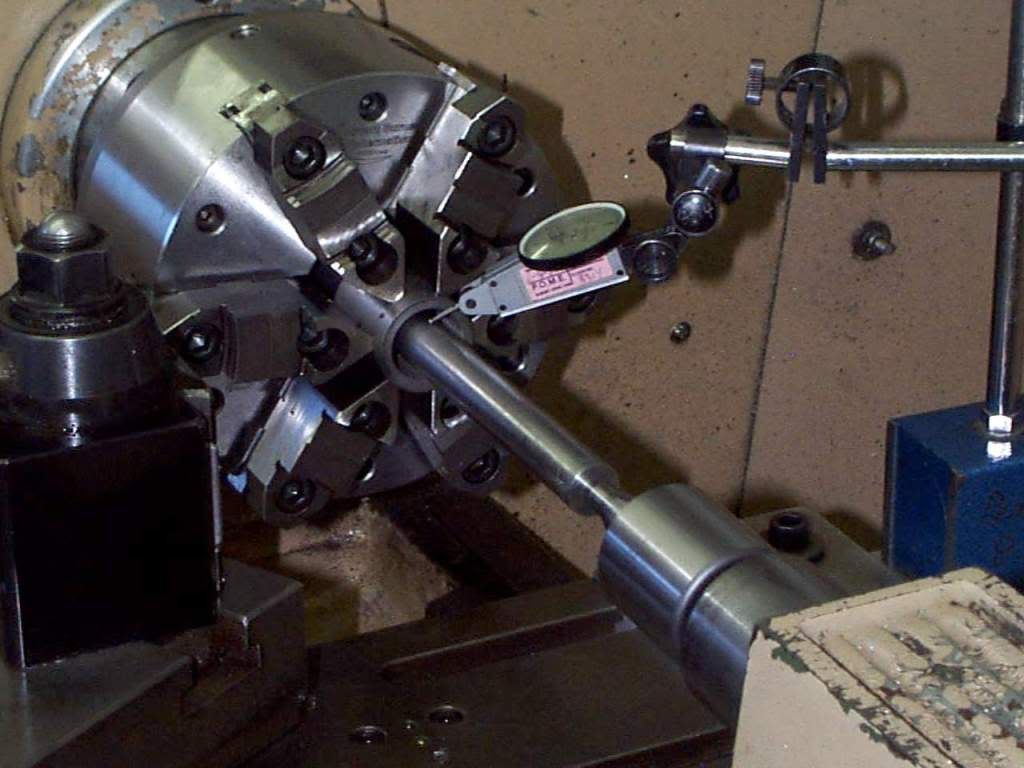
Figure 2 shows the trued receiver. The recoil shoulders have been re-cut for a minimum cleanup and the face of the receiver has also had a minimum clean-up cut done. The 1 & 1/6 x 16 internal threads of the receiver have been picked with a single point threading tool and have been enlarged slightly for a minimum clean-up.
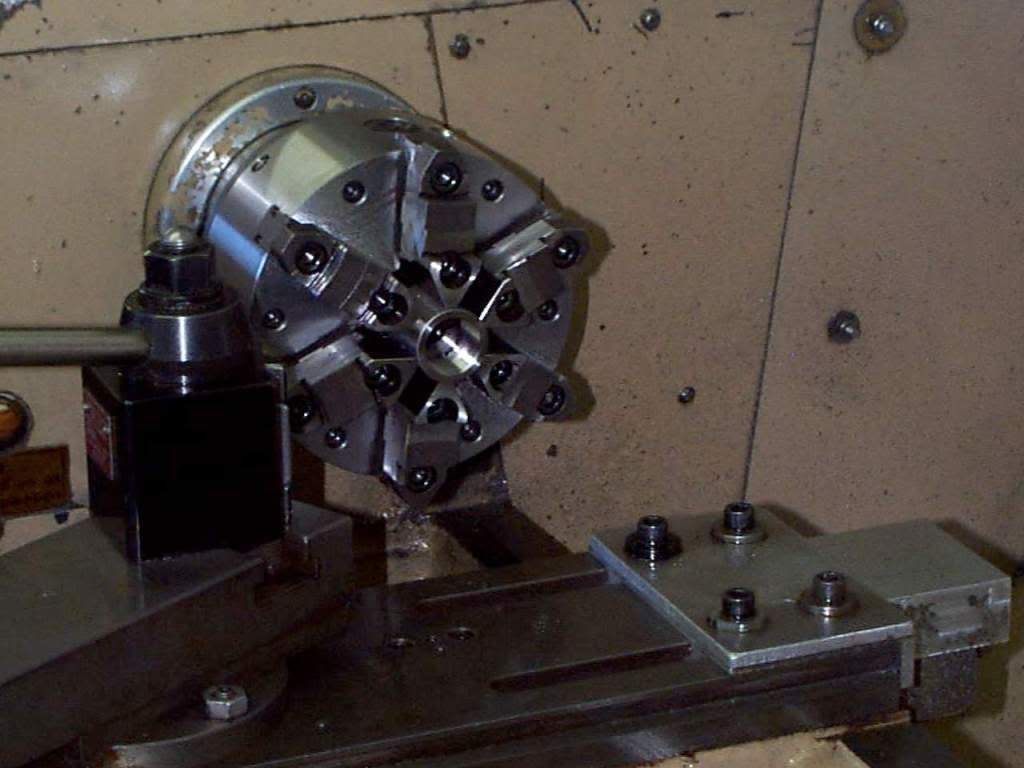
Figure 3 shows the bolt clamped into the precision bolt truing fixture. The fixture is held in a 10 diameter 4 jaw chuck and dialed dead nuts true. Once again I take a minimum clean-up cut across the face of the bolt nose and turn the bolt nose itself to a .690 diameter. I then set up a small carbide boring bar and carefully make a minimum clean up cut on the back of the locking lugs on the bolt. Now all contact surfaces are true and square to the centerline of the bolt body.
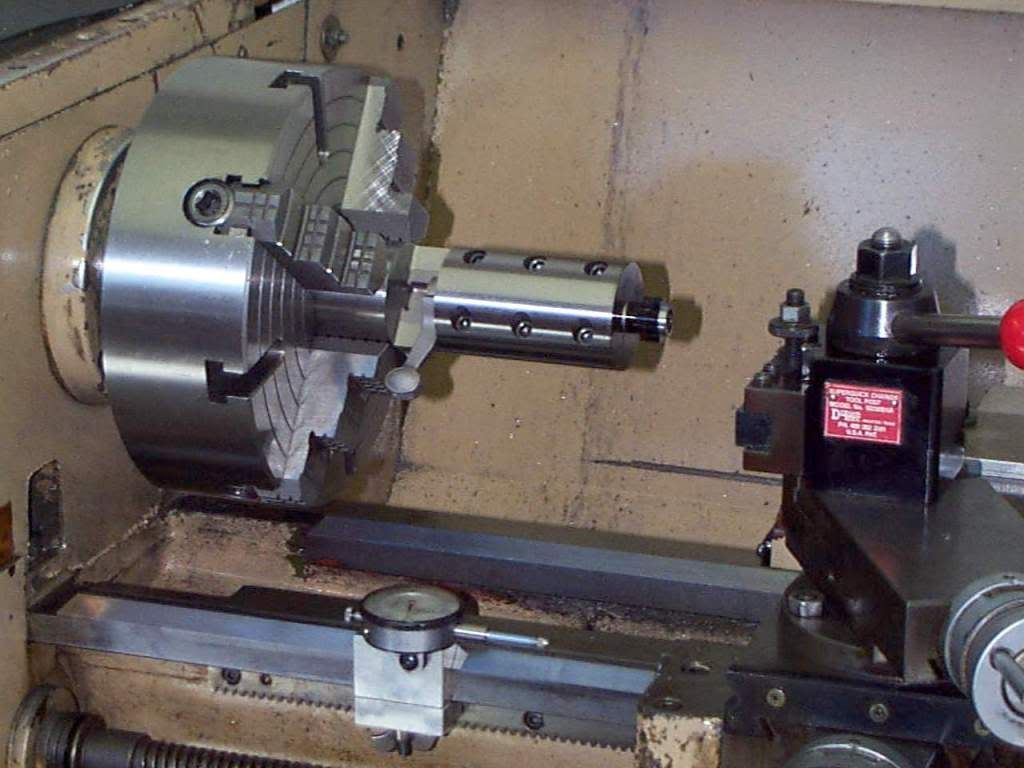
Figure 4 shows the stripped Anschutz 5025 trigger housing being set up on the milling machine. Using a dial indicator, the housing is leveled in the vise and then clamped securely to the angle block with a C clamp. The Anschutz trigger housing is a rough cast part that needs the mounting surfaces cleaned up to insure a precision fit.
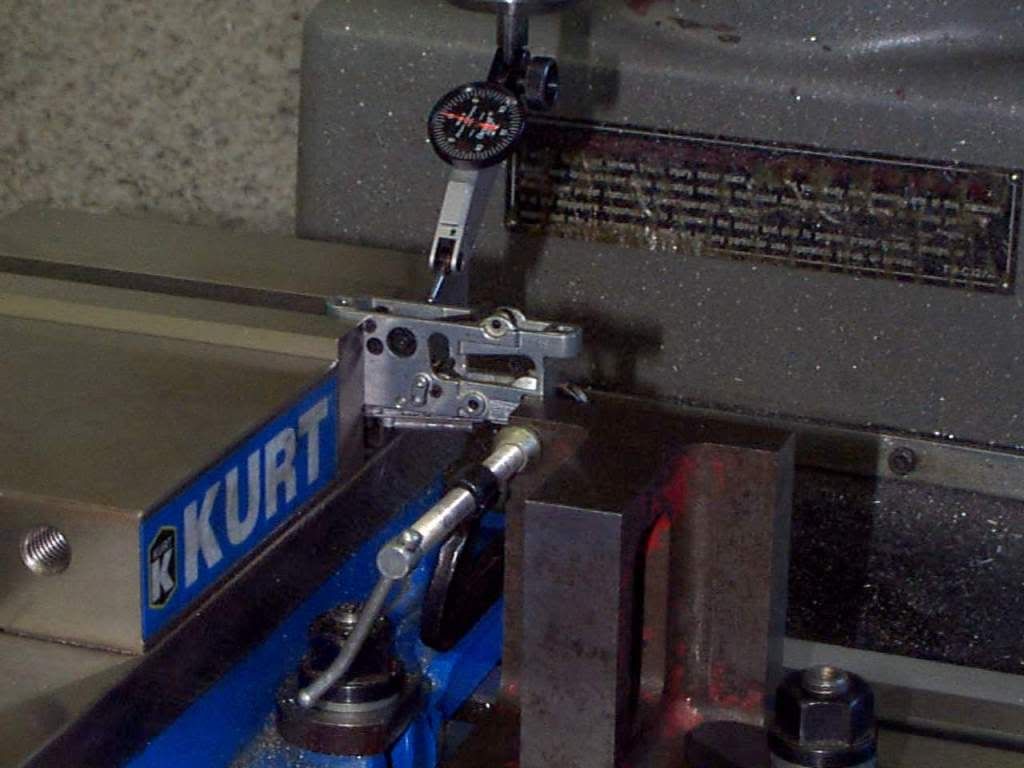
Figure 5 shows the 5025 trigger housing after the milling cuts have been made. You will also notice that the rear mounting hole has been opened up to accept the ¼ - 28 rear guard screw on the Remington 700 action. You will also notice the .085 deep step cut made on the rear of the trigger housing.
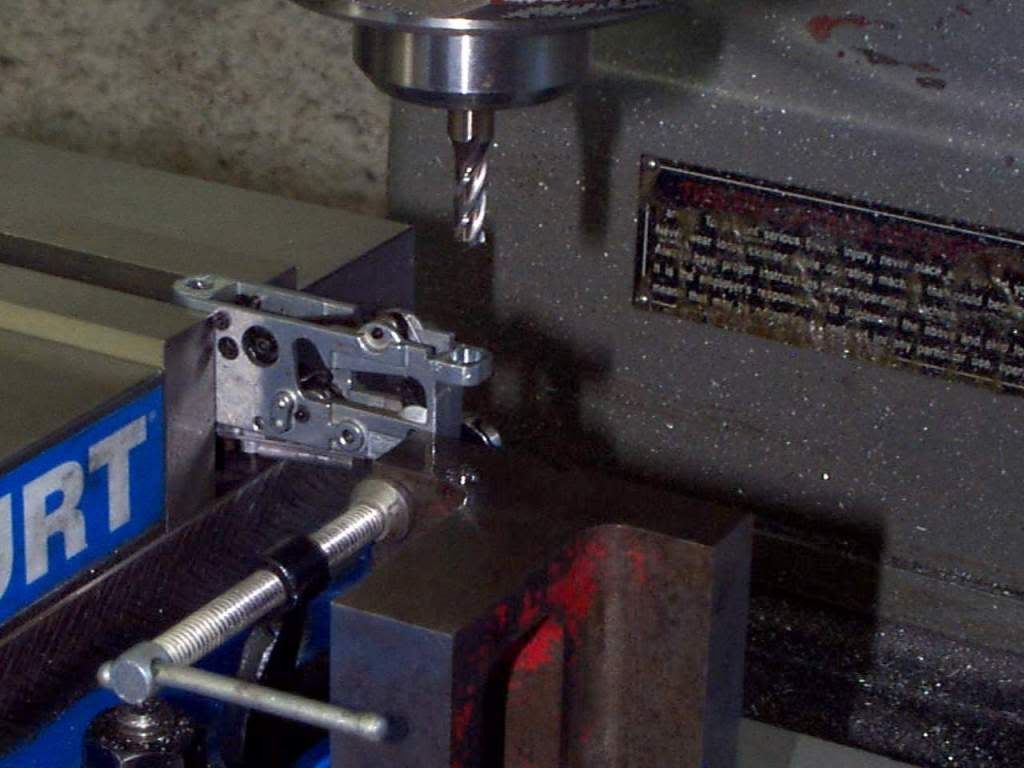
Figure 6 shows the 5025 trigger housing flipped over and clamped to the front mounting surface that was cut in the Figure 5 set up. The task here is to cut a 3/8 counter bore and relieve the trigger housing so that the rear guard screw stanchion may be installed.
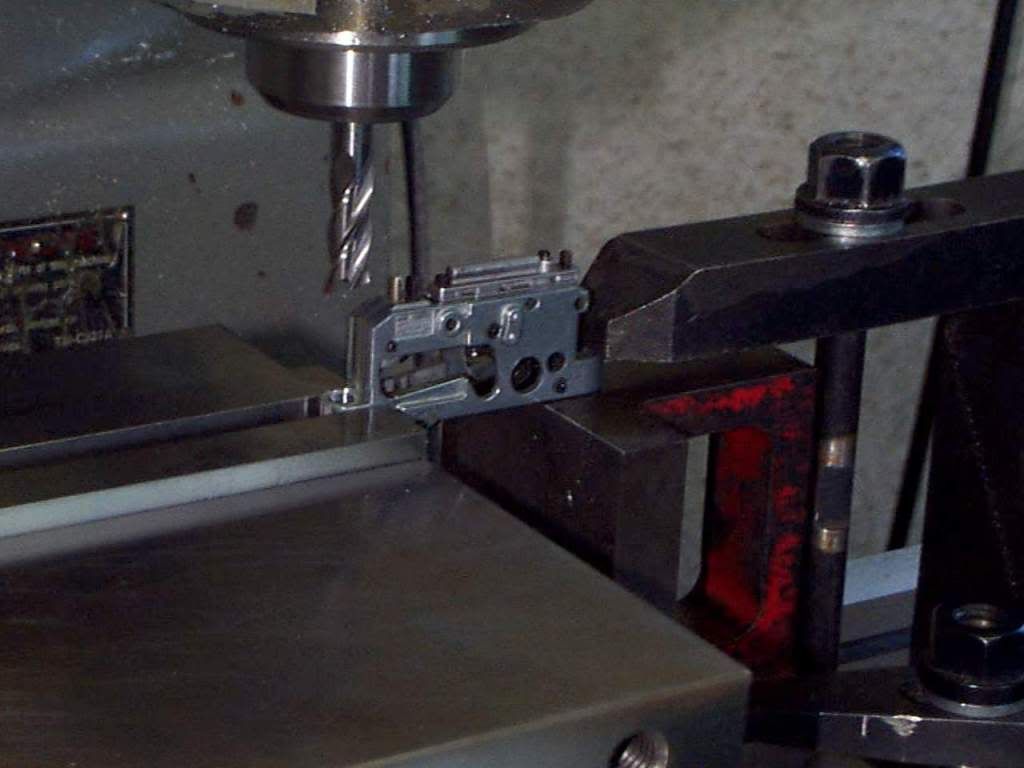
Figure 7 shows the M-700 receiver being set up to machine the bottom of the action to accept the Anschutz trigger. The action is clamped in a 3 jaw upright chuck and dialed in so that it is straight and level. An angle plate and another C clamp help stabilize the receiver for machining. A small screw jack was also used to keep the action level during machining.
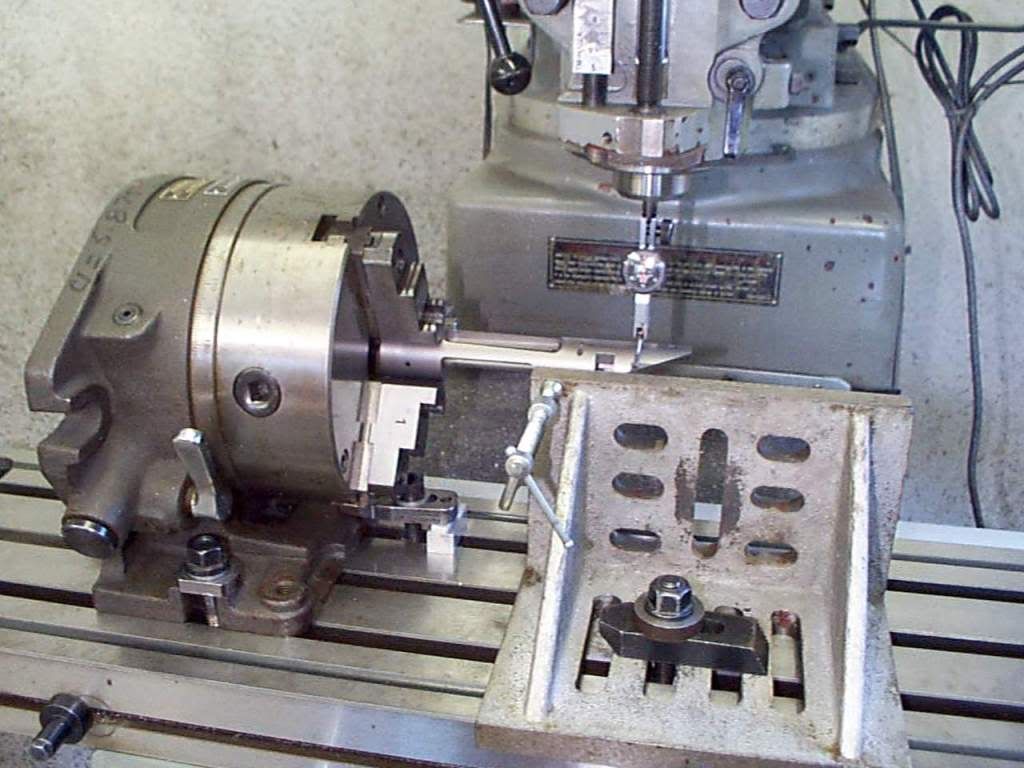
Figure 8 shows the Anschutz 5025 trigger mounted onto the Remington Model 700 Titanium action. Notice the rear guard screw stanchion at the rear of the trigger housing. Its just basically a ¼ - 28 male / female part that holds the trigger housing to the receiver and has a ¼ - 28 threaded hole for the rear trigger guard screw.
Page 2
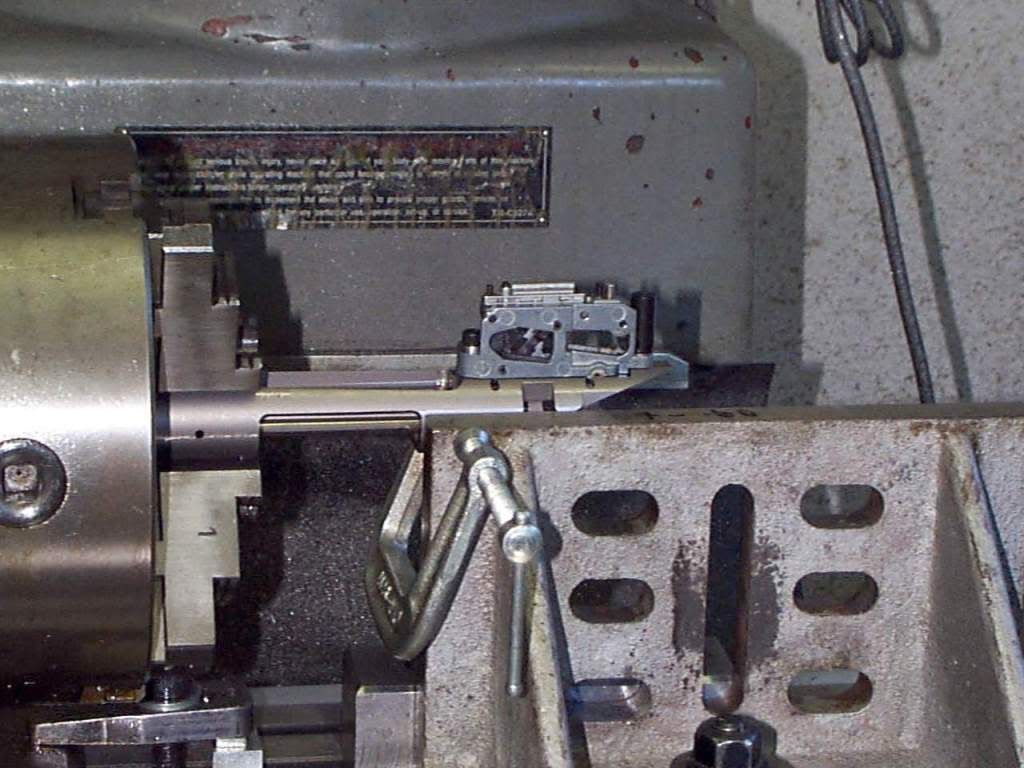
Figure 9 shows the pocket being milled for the new bolt stop. Since you lose the factory bolt stop with this trigger installation, a lever style bolt stop from Nesika Bay Precision is installed into the left rear of the action.
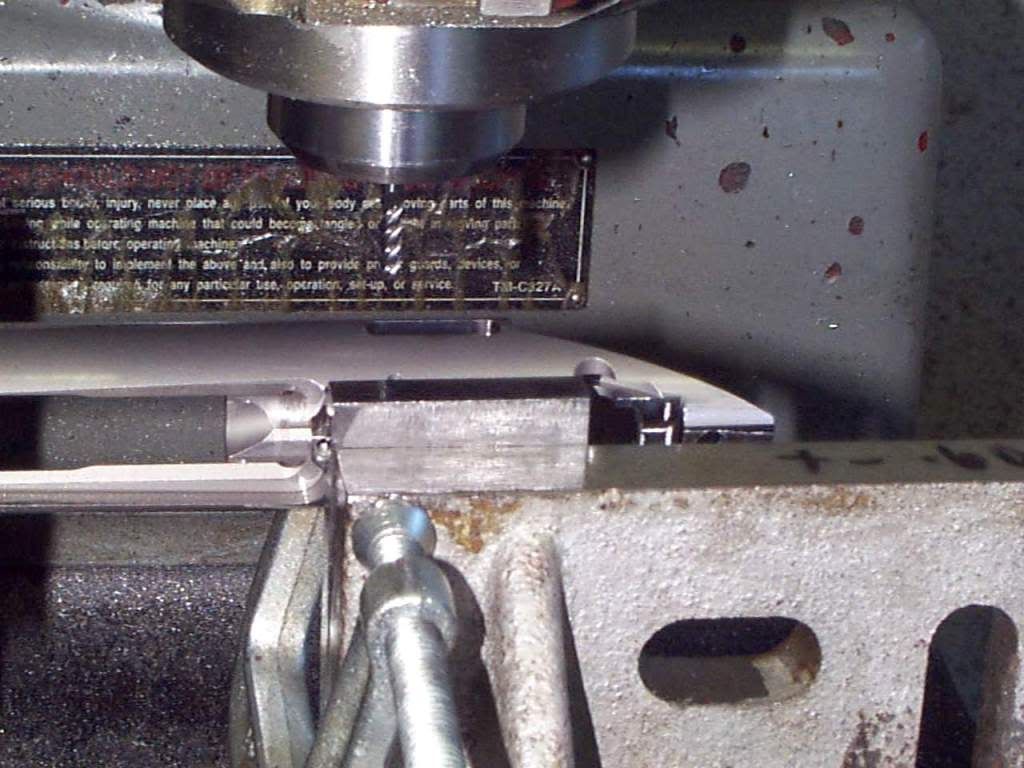
Figure 10 shows how the barrel threading and chambering operations are set up. Using a set of DELTRONIC TP 25 test pins, the barrel can dialed in to 0.0000 to .0001 TIR ( Total Indicator Reading ) . One must understand that the internal diameter of the barrel is never perfectly concentric with the outside contour of the barrel. So by just chucking up on the outside contour, this will not insure that the bore is running true when you start threading and chambering. By using the DELTRONIC pins, which are graduated in increments of .0001, you can select the pin that perfectly fits the internal diameter of the barrel and then dial in the pin so that you know the bore of the barrel is running true.
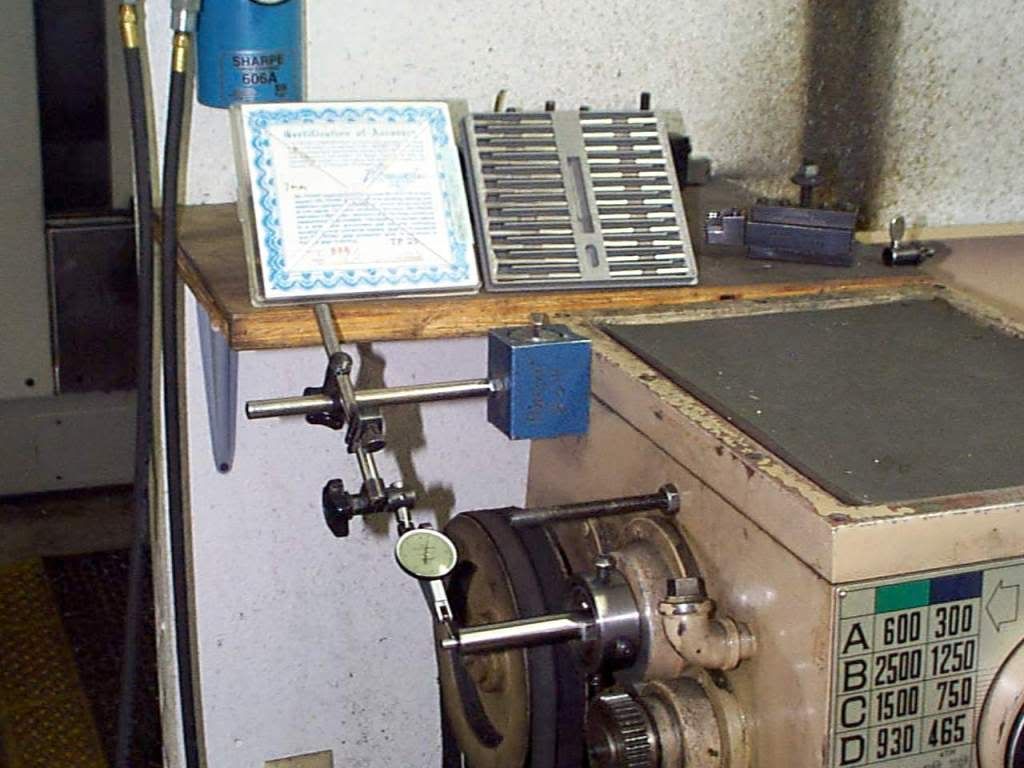
Figure 11 shows the use of the DELTRONIC pins to dial in the breach end of the barrel prior to threading and chambering.
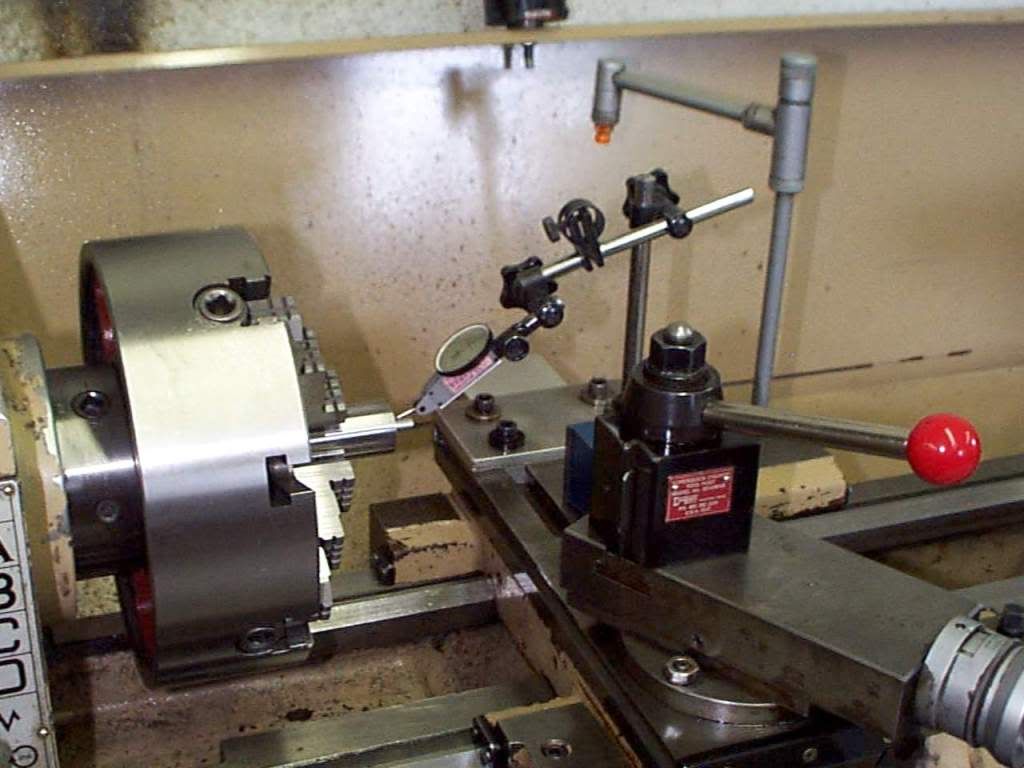
Figure 12 shows the finished threaded and chambered barrel shank.
So there you have it. Now go put a new barrel on that tired old rifle!
Anyway, here's the way I used to do it. I never made a whole lot of money at it but it was worth it when I saw one my customers take a Remington 700 that I worked on and go win the NRA Nationals in High Power Silhouette.
This project is acutually for a High Power " Hunter Rifle Class " Silhouette Rifle. I still used the same exact process when I was just building a plain old long range hunting rifle. Some guys like to do all of barreling work on their lathe between centers. But this would usually mean the aid of a steady rest at some point. For me,I found the method described below is the best way to go.
Also note that the instalation of the 2 stage Anschutz 5025 / 5022 was not a normal addition to the usual long range hunting rig although some of the really long range guys out in Wyoming simply could not live without it.
So here we go. Hope you enjoy. At the very least, I hope this can help give some help asking your gunsmith about he approaches the job of re-barreling whatever ever type of bolt gun you have.
Cheers....Marv
Figure 1 shows the set up used to true the receiver which for this project was a Remington Model 700 Titanium. The action is being held in a Pratt Burnerd six jaw Set Rite adjustable scroll chuck. A precision mandrel was inserted into the action and a live center in the tailstock keeps the mandrel level. Using a Brown and Sharpe dial indicator graduated to 50 millionths of an inch, the Set Rite chuck is carefully adjusted so that the mandrel dials in perfectly thus assuring that the centerline of the action is held in a true concentric and level state.
Figure 2 shows the trued receiver. The recoil shoulders have been re-cut for a minimum cleanup and the face of the receiver has also had a minimum clean-up cut done. The 1 & 1/6 x 16 internal threads of the receiver have been picked with a single point threading tool and have been enlarged slightly for a minimum clean-up.
Figure 3 shows the bolt clamped into the precision bolt truing fixture. The fixture is held in a 10 diameter 4 jaw chuck and dialed dead nuts true. Once again I take a minimum clean-up cut across the face of the bolt nose and turn the bolt nose itself to a .690 diameter. I then set up a small carbide boring bar and carefully make a minimum clean up cut on the back of the locking lugs on the bolt. Now all contact surfaces are true and square to the centerline of the bolt body.
Figure 4 shows the stripped Anschutz 5025 trigger housing being set up on the milling machine. Using a dial indicator, the housing is leveled in the vise and then clamped securely to the angle block with a C clamp. The Anschutz trigger housing is a rough cast part that needs the mounting surfaces cleaned up to insure a precision fit.
Figure 5 shows the 5025 trigger housing after the milling cuts have been made. You will also notice that the rear mounting hole has been opened up to accept the ¼ - 28 rear guard screw on the Remington 700 action. You will also notice the .085 deep step cut made on the rear of the trigger housing.
Figure 6 shows the 5025 trigger housing flipped over and clamped to the front mounting surface that was cut in the Figure 5 set up. The task here is to cut a 3/8 counter bore and relieve the trigger housing so that the rear guard screw stanchion may be installed.
Figure 7 shows the M-700 receiver being set up to machine the bottom of the action to accept the Anschutz trigger. The action is clamped in a 3 jaw upright chuck and dialed in so that it is straight and level. An angle plate and another C clamp help stabilize the receiver for machining. A small screw jack was also used to keep the action level during machining.
Figure 8 shows the Anschutz 5025 trigger mounted onto the Remington Model 700 Titanium action. Notice the rear guard screw stanchion at the rear of the trigger housing. Its just basically a ¼ - 28 male / female part that holds the trigger housing to the receiver and has a ¼ - 28 threaded hole for the rear trigger guard screw.
Page 2
Figure 9 shows the pocket being milled for the new bolt stop. Since you lose the factory bolt stop with this trigger installation, a lever style bolt stop from Nesika Bay Precision is installed into the left rear of the action.
Figure 10 shows how the barrel threading and chambering operations are set up. Using a set of DELTRONIC TP 25 test pins, the barrel can dialed in to 0.0000 to .0001 TIR ( Total Indicator Reading ) . One must understand that the internal diameter of the barrel is never perfectly concentric with the outside contour of the barrel. So by just chucking up on the outside contour, this will not insure that the bore is running true when you start threading and chambering. By using the DELTRONIC pins, which are graduated in increments of .0001, you can select the pin that perfectly fits the internal diameter of the barrel and then dial in the pin so that you know the bore of the barrel is running true.
Figure 11 shows the use of the DELTRONIC pins to dial in the breach end of the barrel prior to threading and chambering.
Figure 12 shows the finished threaded and chambered barrel shank.
So there you have it. Now go put a new barrel on that tired old rifle!
