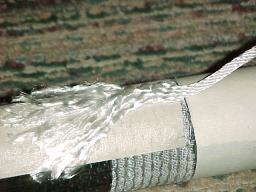
|
Supplies that you
will need to make this project turn out just like a pro did it: |
|
80-120 feet (depending upon length of
wraps) of 3/16" nylon rope. Some people use 1/8" but most use 3/16".
Masking tape
Sharp knife
A small flat head screwdriver or large nail
Hammer
|
About 3-4 feet of heavy monofilament line
(50 plus pounds is best) Wire-twisting hook
or something similar (see picture below)
2 cans spray shellac or varnish
Optional: doubleback tape |
|
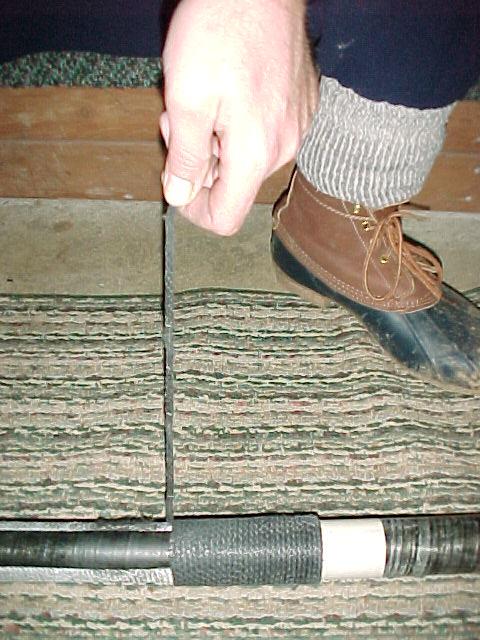
Begin the process by marking where your
current wraps start and finish on the oarshaft by marking the oar
with a complete wrap of masking tape butting up against each end of
the wrap. You can modify the placement and / or length if you need
to, but most wraps should already be located in the proper position.
|
 |
|
Now, cut through the old wrap at one end
and begin unraveling the old rope from the oarshaft. If you have
oars with removable blades, you will find it much easier to do this
and the remaining steps with the blades removed. |
 |
|
Now, place a strip of doubleback tape
along the length of the oar between your marks. This is a wide tape
used for golf club regripping that I am using here, usually most
people are only able to find narrower strips in which case put a few
strips along the circumference of the shaft. Remove the tape backing
to expose the adhesive. |
 |
|
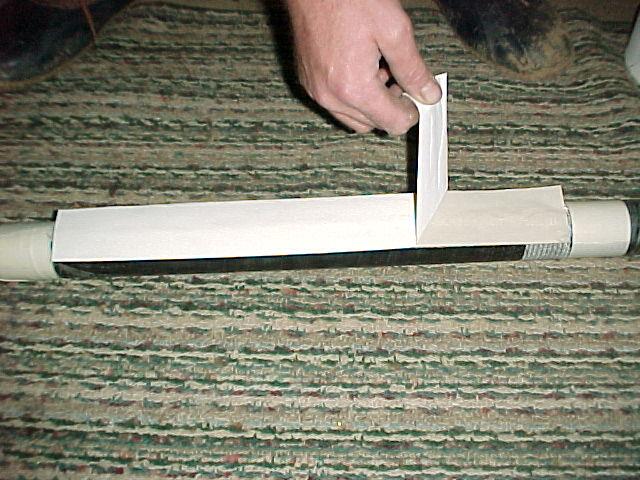
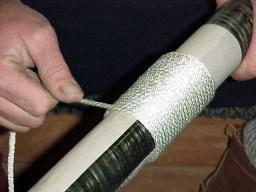
Take a small flathead screwdriver or
larger nail and unravel the strands of the rope for about three to
four inches of its length. Make sure to do this completely or you
will have a lump in your finished wrap. The next step is to lay the
rope as shown to the left at what will be the TOP (closest to the
handle) part of your wrapping. |
 |
|
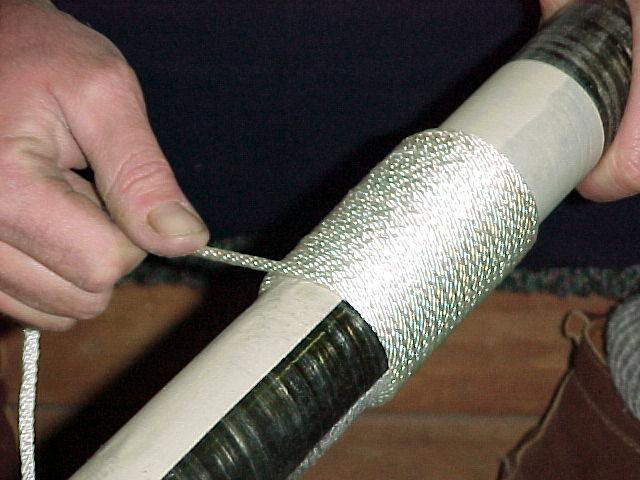
Begin wrapping the rope around the shaft, beginning
near your start point marked by masking tape. The first few wraps
are a little tough to get started, but once you get the first ones
in place, things will be a breeze! |
 |
|
Continue making wraps down the length of
the shaft. Make sure to nestle each warp snugly against the one
above it and pull very tight against the shaft. This step takes some
time and lots of rope, so be prepared! |
 |
|
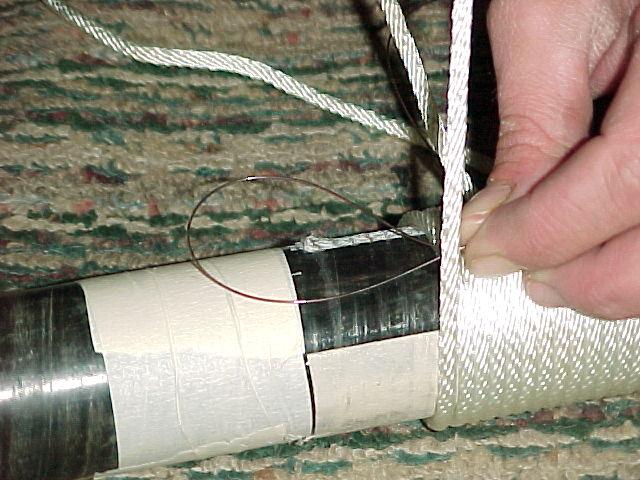
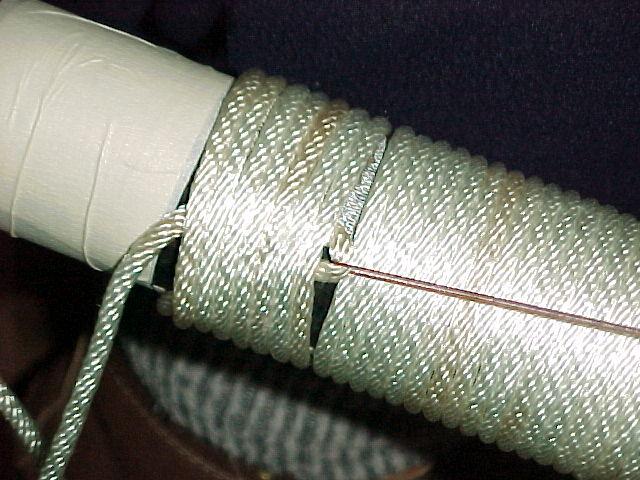
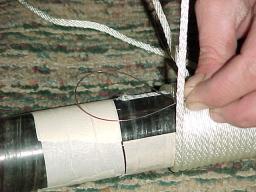
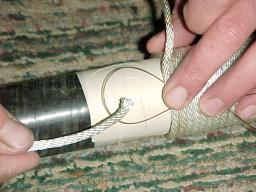
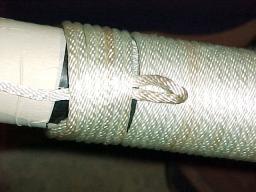
When you get to the point where you have
about 2 1/2 inches of wrapping left to do, insert a loop of very
heavy monofilament line under a wrap. Place the loop end toward the
bottom of the oar and the tag ends toward the top. |
 |
|
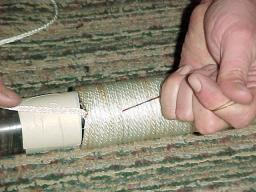
Leaving a small gap between the wraps
without mono underneath and the the one that does, begin wrapping
the shaft again. In these final wraps, keep them against one
another, but don't pull them quite as tight as you were previously
making them on the wraps earlier in the process. |
 |
|
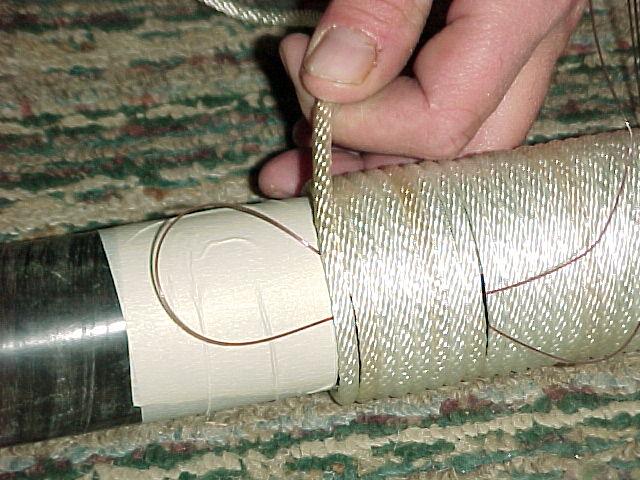
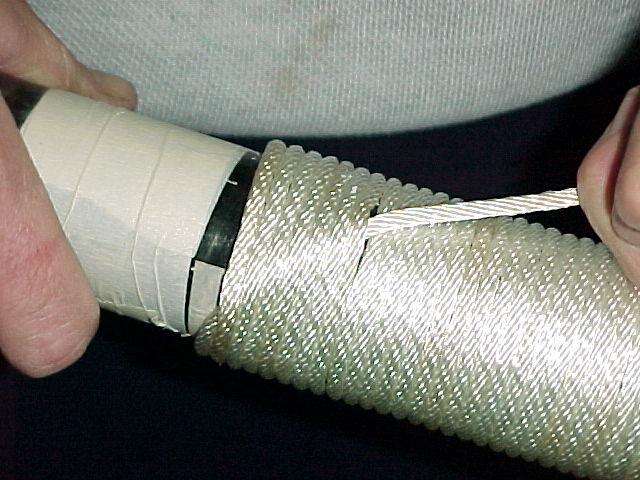
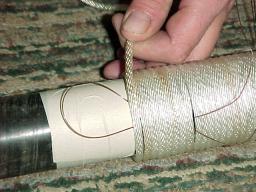
Continue wrapping until you get to the
point on the shaft which you marked earlier as your finish point.
Now, cut your rope about two feet from the last wrap on the oar and
place this tag end through the loop of monofilament. |
 |
|
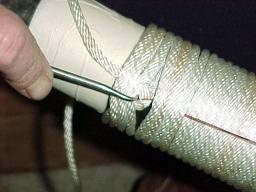
Your next step is to pull the mono back
toward the top of the oar pulling this tag end of rope you created
in the last step underneath the wraps already in place. |
 |
|
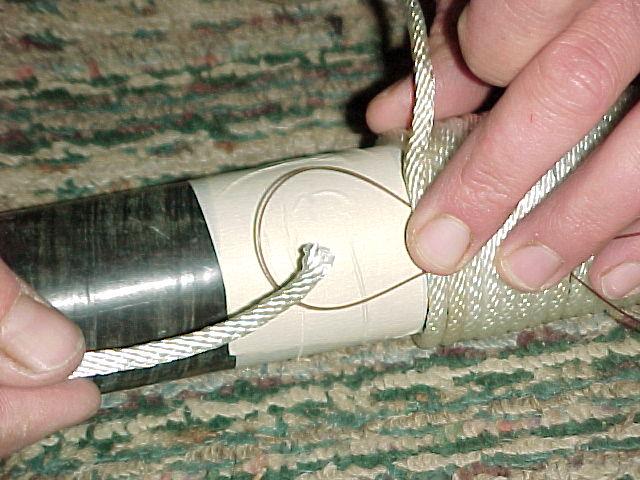
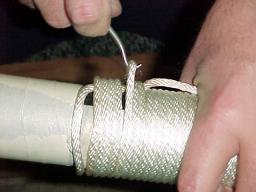
Depending upon just how tight you made
your wraps, you may have to use a hook of some sort or perhaps a
screwdriver to lift each wrap up and over the line that you are
pulling up the length of the shaft. |
 |
|
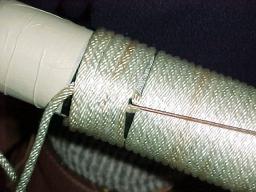
Keep working this loop of rope up the
shaft under the rope wraps until it pulls clear of the wraps of
rope. |
 |
|
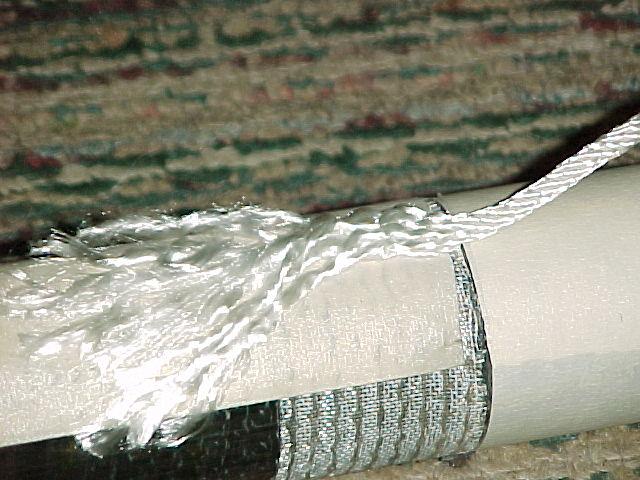
Remove the monofilament from the loop of
rope and pull the loose end of rope all the way through from
underneath the wraps. |
 |
|
Use the wire twisting hook or something
similar to pull each wrap as snug as you get it; starting from the
uppermost wrap down toward the bottom of the oar. |
 |
|
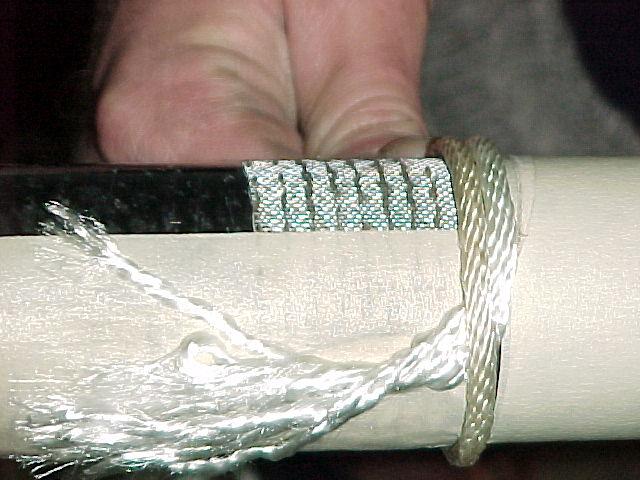
Pull your tag end tight and try to work
all wraps as close together as possible. |
 |
|
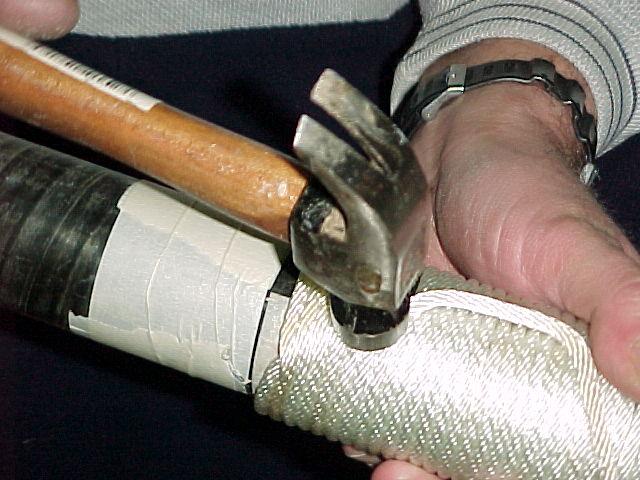
Your next step is to take a hammer and
pound gently on the hump you have over the rope underneath the wraps
to try to flatten it out as much as possible. |
 |
|
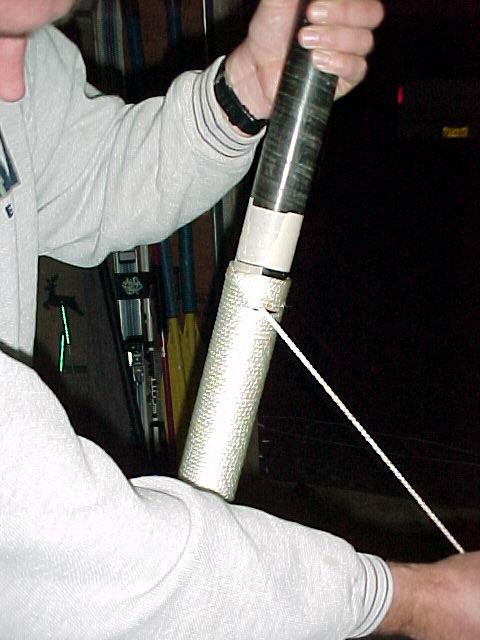
Now place the oar on the ground with the
grip portion in the air. Pull the tag end of line as just tightly as
you can ... use all your weight if possible. |
 |
|
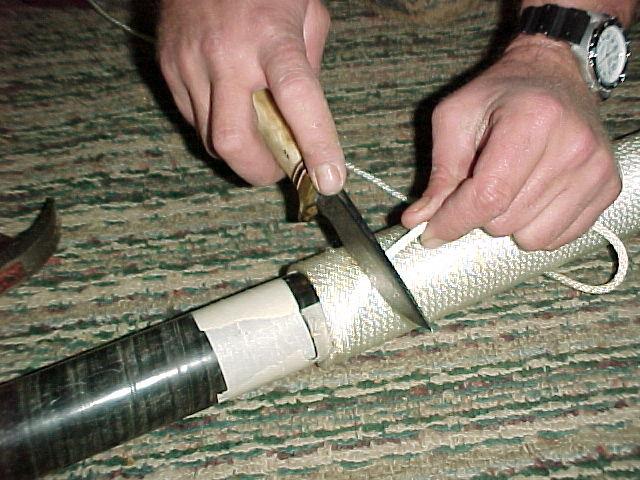
Now, you lay the oar flat on the ground
again and with a sharp knife, carefully cut the tag end of line off inbetween
the wraps. |
 |
|
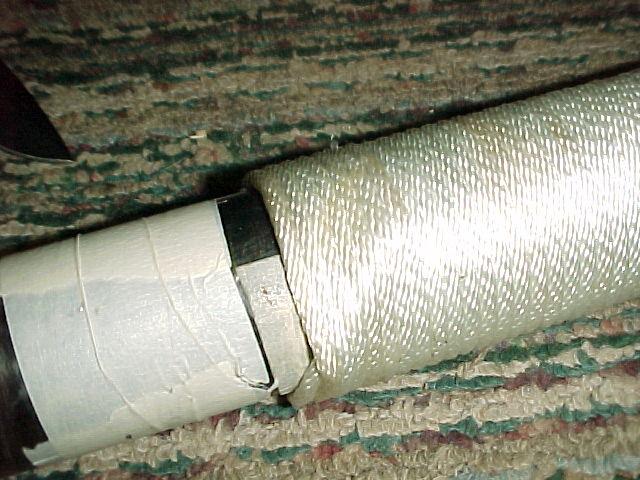
The wrap is finished, this is how the
finished product should look if done correctly. Now for the
finishing touches. |
 |
|
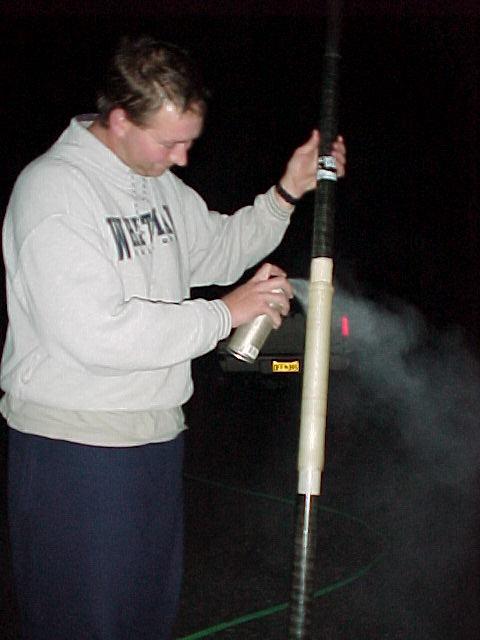
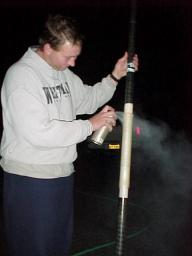
To finish things off, take a can of spray
shellac and saturate the finished wrap job. I'll spray the oar
several times, loading the robe fibers just as much as I can. You
can opt to skip this step, but the wrap will be harder and tend to
last longer if you finish it off this way. Another bonus is that the
rope cannot absorb much water and won't tend to ice up and be quite
so slippery on those really cold mornings. Once dry, remove your
masking tape markers and you're done! Now time for the next oar :) |
 |
|
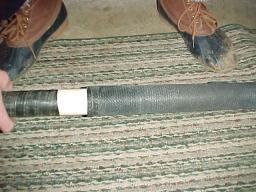
That's all there is to it! Depending upon how
much you row, this ought to last you for years. Where did I learn to do this?? Refinishing golf clubs, this is how you
rewhip a persimmon headed wood. So if you ever need to do that, you'll
have the ability to do that as well. As always, good fishing! |