#830241 - 03/20/13 05:47 PM
 Refinishing my old shotgun.
|

Reverend Tarpones
Registered: 10/09/02
Posts: 8379
Loc: West Duvall
|
I THINK I may have a go at refinishing my old Beretta AL2. After 40 years its looking a bit rough. I have never done anything like this before. Sooo, Andy, others, any suggestions, advise, photo essays?
_________________________
No huevos no pollo.
|
|
Top
|
|
|
|
#830256 - 03/20/13 06:27 PM
 Re: Refinishing my old shotgun.
[Re: Dave Vedder]
|

Poodle Smolt

Registered: 05/03/01
Posts: 10878
Loc: McCleary, WA
|
Chemical stripper. Get it to bare wood. Toothbrush to clean out the checkering.
If you want a gloss or satin finish that is bulletproof, get a two part table top epoxy resin. It would be the last finish you would need on the firearm.
Or you could go camo, and buy a few cans of Krylon.
_________________________
"Give me the anger, fish! Give me the anger!"
They call me POODLE SMOLT!
The Discover Pass is brought to you by your friends at the CCA.
|
|
Top
|
|
|
|
#830262 - 03/20/13 06:39 PM
 Re: Refinishing my old shotgun.
[Re: Dogfish]
|

Poodle Smolt

Registered: 05/03/01
Posts: 10878
Loc: McCleary, WA
|
Another option would to have it "hydro dipped". All you would have to do is hand it off to them, and it is done. No fun in that, but it is also a pretty bulletproof process. $180. This is a local company based in Montesano. http://www.northwesthydroprint.com/
_________________________
"Give me the anger, fish! Give me the anger!"
They call me POODLE SMOLT!
The Discover Pass is brought to you by your friends at the CCA.
|
|
Top
|
|
|
|
#830267 - 03/20/13 06:44 PM
 Re: Refinishing my old shotgun.
[Re: Dogfish]
|

Hey Man....It's cool...

Registered: 08/18/02
Posts: 4242
Loc: seattle
|
Dave is older than gun powder Andy. He doesn't need it to last  I did a couple of old guns with nice wood (by today's standards). I stripped the wood and then fine sanded. I then rubbed in turpentine. Looks great. I'll take a couple of pictures tonight and post them. The hydro dip stuff looks great too and much easier.
|
|
Top
|
|
|
|
#830292 - 03/20/13 07:41 PM
 Re: Refinishing my old shotgun.
[Re: seastrike]
|

Poodle Smolt

Registered: 05/03/01
Posts: 10878
Loc: McCleary, WA
|
I implied that the finish would outlive Vedder. I thought that was a kinder approach for someone of his antiquity.
_________________________
"Give me the anger, fish! Give me the anger!"
They call me POODLE SMOLT!
The Discover Pass is brought to you by your friends at the CCA.
|
|
Top
|
|
|
|
#830294 - 03/20/13 07:49 PM
 Re: Refinishing my old shotgun.
[Re: Dogfish]
|

Reverend Tarpones

Registered: 10/09/02
Posts: 8379
Loc: West Duvall
|
I may just see how it shoots with the new finish. Any ideas for targets? I have a few.
_________________________
No huevos no pollo.
|
|
Top
|
|
|
|
#830300 - 03/20/13 08:22 PM
 Re: Refinishing my old shotgun.
[Re: JTD]
|

Reverend Tarpones

Registered: 10/09/02
Posts: 8379
Loc: West Duvall
|
I cannot believe he hasn't offered some tips already
_________________________
No huevos no pollo.
|
|
Top
|
|
|
|
#830344 - 03/20/13 11:02 PM
 Re: Refinishing my old shotgun.
[Re: Direct-Drive]
|

Hey Man....It's cool...

Registered: 08/18/02
Posts: 4242
Loc: seattle
|
I haven't posted in a while so let's see if I can remember... First pic is a family gun. It's a Springfield 1873. 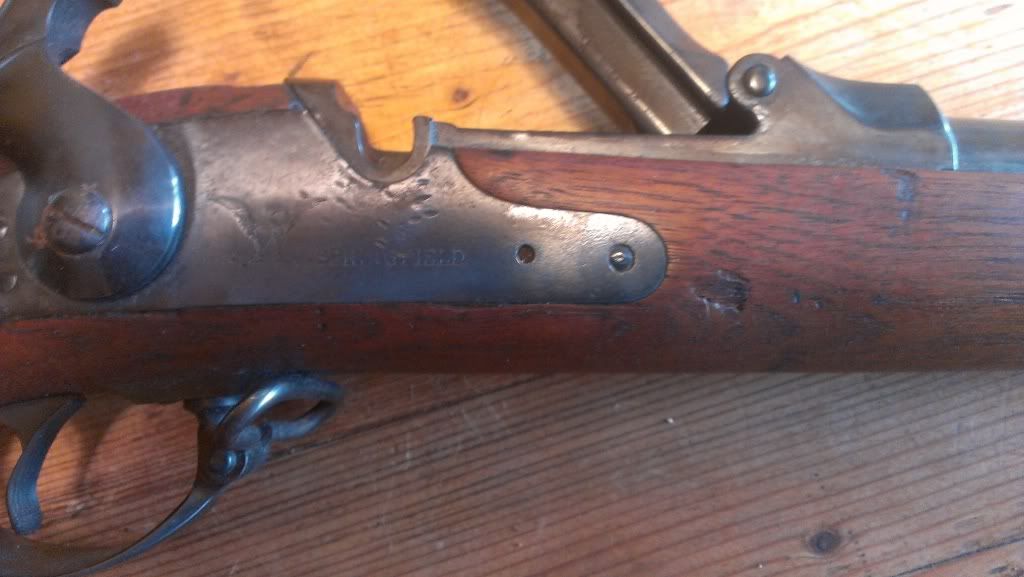 Second picture is the same gun. 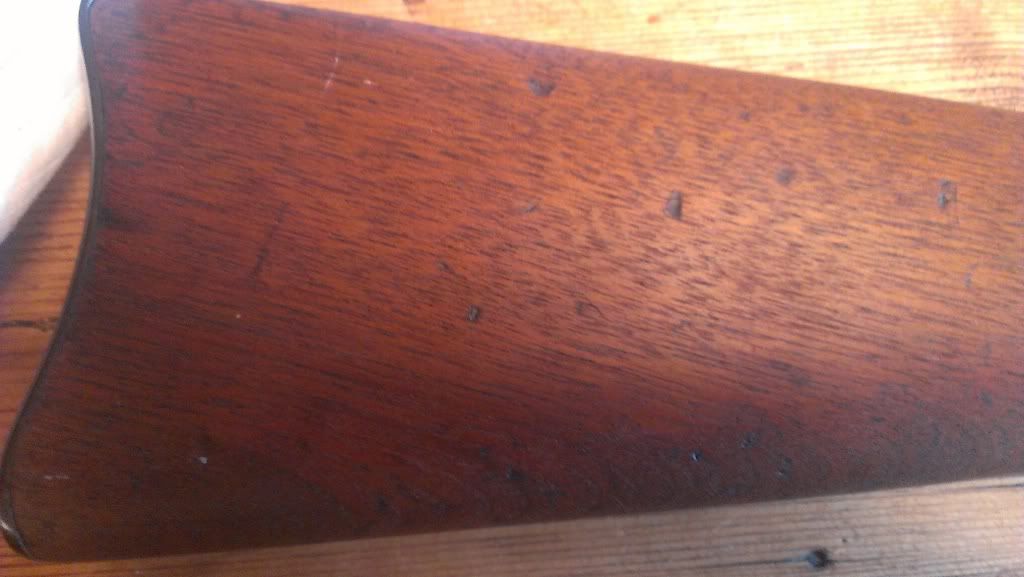 This one is a Stevens from the 50's. A buddy gave me this before moving out of the country. With his permission I brass wooled the metal and sanded/turpentined the wood. 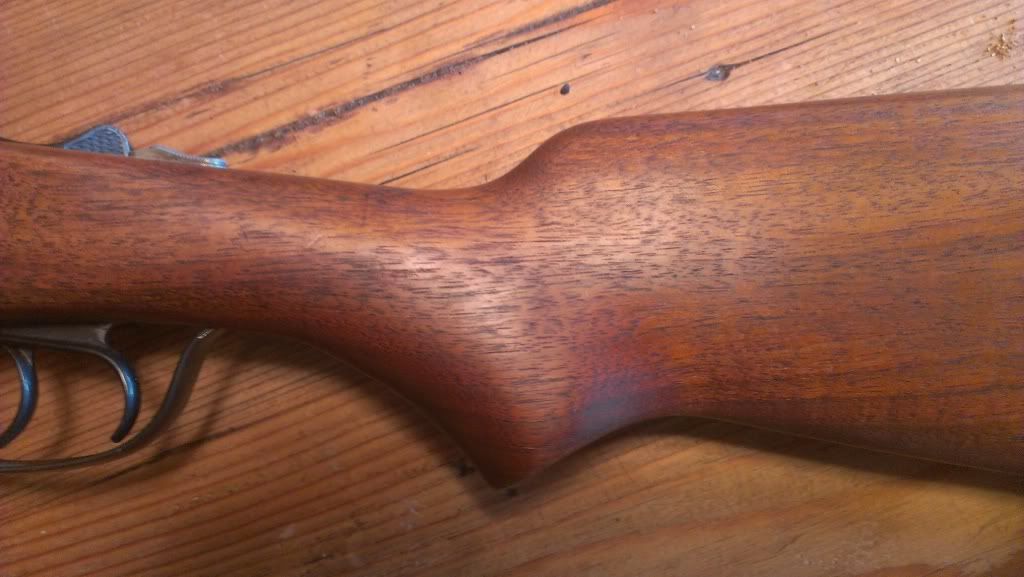 Another of the Stevens 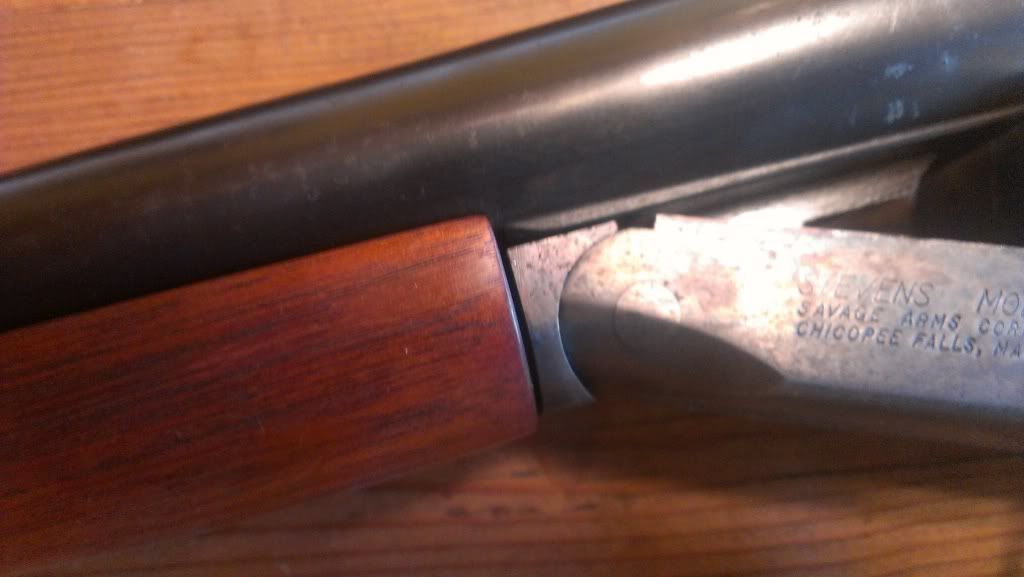 If the wood has any character I think this is a great way to go. Hope to hit the marsh or fields with you again this winter Dave. Last season the boy put a lot into the mammal hunting. Hoping to get out for more birds this year. 
|
|
Top
|
|
|
|
#830354 - 03/20/13 11:29 PM
 Re: Refinishing my old shotgun.
[Re: seastrike]
|

The Chosen One

Registered: 02/09/00
Posts: 13956
Loc: Mitulaville
|
Damn Seastuck, I thought those were the before pics...was waiting to see the after pics. D'oh! Guess my expectations of a refinished wood project is a little different than yours.  Here's the Steven's that I worked on...including redoing the in-lay stuff.  (Feet included just for Dogfish) The Laurel Mountain sealer and finish are awesome and I'd highly recommend them to anyone refinishing a gun. Our retired gunsmith buddy up at Lake Stevens recommended it to me. He knows his stuff.  http://www.laurelmountainforge.com/instructions.htm http://www.laurelmountainforge.com/instructions.htm
_________________________
T.K. Paker 
|
|
Top
|
|
|
|
#830460 - 03/21/13 09:49 AM
 Re: Refinishing my old shotgun.
[Re: The Moderator]
|

Hey Man....It's cool...

Registered: 08/18/02
Posts: 4242
Loc: seattle
|
|
|
Top
|
|
|
|
#830987 - 03/23/13 10:49 PM
 Re: Refinishing my old shotgun.
[Re: seastrike]
|

Returning Adult
Registered: 06/11/07
Posts: 387
Loc: West of Seattle
|
What do you want to refinish?
Use a mild liquid stripper to remove all/most of the old finish. As for removing the old finish in the checkering, just scrub it with some old toothbrushes and blot it up with paper towels after the stripper has had time to do its work. Time consuming, but it will work. And as for sanding the stocks without blunting the sharpness of the checkering, use painters tape, trim it to fit each checkered pattern with an X-acto knife, and then just sanding carefully around these masked areas if needed. You can steam out many dents/dings with a damp cloth and cloths iron.
Just to confuse you more, here is why I chose my finish.
Tung Oil is applied by just rubbing it in with a rag. The process is identical to Tru Oil, but I just think Tung Oil is a little easier to use. Like with painting more LIGHT coats are better. Resist the temptation, when I say LIGHT I mean 1/3 the amount of oil you think.
My process went like this...
Preparation:
Strip the old finish.
Sand / steam out any imperfections.
De-whisker. This should be very little because you are refinishing and not doing a lot of sanding.
Day one:
Apply one coat of Tung Oil everywhere. coverage is key for this first coat.
Wait 30 minutes and it should be dry to the touch.
Apply another coat.
Wait until the next day.
Day two:
Sand lightly with 400 grit using a sanding block, not the checkering. The sanding block is important.
Apply Tung Oil everywhere.
Wait 30 minutes. It should be dry to the touch. If not, wait until it is.
Apply another coat.
Wait until tomorrow.
Day three:
Sand lightly with 400 grit using a sanding block. Never the checkering.
Evaluate the finish. If you see little shiny spots, the grain has not been filled in.
At this point you have two options because the gain must be filled in to get that professional finish. You can repeat the 400 grit every day until the grain is filled in or you can do a slurry. Do do the slurry, instead of sanding dry, use the Tung Oil to sand with. This will create a slurry made up of the fine saw dust from sanding. This will fill in the grain much quicker. The long method is better, but it would take a keen eye and a magnifying glass to tell the difference. I chose the long method.
Apply a coat of Tung Oil.
Wait until tomorrow.
Repeat until the grain is filled in. (you see no shiny spots after sanding)
Day x:
Run your hand over the cured finish. You will feel some spots where dust has settled on your stock. Unless you have a sealed room, this will happen.
Use 600 or 800 grit and lightly sand again.
Wipe the stock thoroughly to remove any dust.
Wait at least one hour to let the dust settle. It would be better to move to another room where no sanding has been done.
Apply one thin coat. No need to go into the checkering with this coat.
Wait until tomorrow.
Day x+1:
Evaluate the finish. As you run your hand over the finish, you will still feel the little pieces of dust. They should be very light. How does the shine look to you?
Once you have a coat or two applied after the gain was filled in, you can begin to get the end result.
At this point I leave the sand paper behind. I will only use an old t-shirt to rub the finish down. Believe it or not, the t-shirt will take off the little dust particles and shine things up a little.
Keep doing this process until you have the shine you want. Resist the urge to stop after applying a coat and letting it cure. The final step must be a rub down with the t-shirt. If you don't, your finish may not be sturdy enough to stand up to regular use and will show scratches easily. Also, don't start rubbing too early. If the finish is not fully cured you'll bugger it and have to sand it down and start the final steps again.
I'm not a pro. This is just what I did and I'm very happy with the result. It's a long process, but worth it in the end. If you follow it, you will be happy too. What you don't want is to hear, "Did you re-finish this yourself?" Trust me, people can tell. What you do want is to hear people say, "Wow, that stock looks great!" Then you can say that you did the finish yourself and watch their surprise.
|
|
Top
|
|
|
|
|
|
1 registered (DrifterWA),
821
Guests and
3
Spiders online. |
|
Key:
Admin,
Global Mod,
Mod
|
|
11505 Members
17 Forums
73092 Topics
827181 Posts
Max Online: 4105 @ 01/15/26 03:57 PM
|
|
|


 Previous Topic
 Index
Index

